


Form Validation in React with Formik
Building a Secure Client Side Form Validation


Introduction
As a front-end developer, one crucial aspect of building robust web applications is implementing form validation to ensure data integrity and security.
In this article, we'll explore how to leverage Formik, a powerful form library, to create a user registration form. We'll focus on validating fields such as full name, email, phone number, username, and password. Additionally, we'll enforce rules such as password complexity requirements.
Before we dive in, make sure to check out the accompanying tutorial video here for a visual walkthrough or access the code here.
Setting Up the Project
I will be using code-sandbox throughout in this article, make sure you have a React.js project set up. Install Formik and Yup, a validation schema library, by running the following command:
npm install formik yup
The command above will install Formik and Yup in our React app.
Creating the User Registration Form
We'll start by creating a new file, RegistrationForm.js, which will contain our form component. Import the necessary dependencies at the beginning of the file:
import React from 'react';
import { Formik, Form, Field, ErrorMessage } from 'formik';
import * as Yup from 'yup';
Defining the Validation Schema
We'll define a Yup validation schema to enforce specific rules for each field. In the RegistrationForm.js file, add the following validation schema right below the import statements:
import React from 'react';
import { Formik, Form, Field, ErrorMessage } from 'formik';
import * as Yup from 'yup';

const validationSchema = Yup.object().shape({
  fullName: Yup.string().required('Full name is required'),
  email: Yup.string().email('Invalid email address').required('Email is required'),
  phoneNumber: Yup.string().required('Phone number is required'),
  username: Yup.string().required('Username is required'),
  password: Yup.string()
    .required('Password is required')
    .matches(
      /^(?=.*[a-z])(?=.*[A-Z])(?=.*\d)(?=.*[@$!%*?&])[A-Za-z\d@$!%*?&]{8,}$/,
      'Password must have at least 8 characters, including one uppercase letter, one lowercase letter, one number, and one special character'
    ),
});
Implementing the Form Component
Inside the RegistrationForm.js file, add the following code for the form component:
const RegistrationForm = () => {
    const handleSubmit = (values) => {
    // Handle form submission here
    console.log(values);
  };

  return (
    <Formik
      initialValues={{
        fullName: "",
        email: "",
        phoneNumber: "",
        username: "",
        password: ""
      }}
      validationSchema={validationSchema}
      onSubmit={handleSubmit}
    >
      <div className="container">
        <h2>Formik Form Validation</h2>
        <Form>
          <div className="form-box">
            <label htmlFor="fullName">Full Name</label>
            <Field
              type="text"
              id="fullName"
              name="fullName"
              className="form-input"
            />
          </div>

          <div className="form-box">
            <label htmlFor="username">User Name</label>
            <Field type="text" id="username" name="username" />
          </div>

          <div className="form-box">
            <label htmlFor="email">Email</label>
            <Field type="text" id="email" name="email" />
          </div>

          <div className="form-box">
            <label htmlFor="phoneNumber">Phone number</label>
            <Field type="number" id="phoneNumber" name="phoneNumber" />
          </div>

          <div className="form-box">
            <label htmlFor="password">Password</label>
            <Field type="password" id="password" name="password" />
          </div>

          <button type="submit">Submit</button>
        </Form>
      </div>
    </Formik>
  )
}
export default RegistrationForm;
Navigate to your App.js file, clear the default Reactjs code and paste the below code snippet.
import RegistrationForm from './RegistrationForm';

function App() {
  return (
    <div className="App">
      <RegistrationForm />
    </div>
  );
}

export default App;
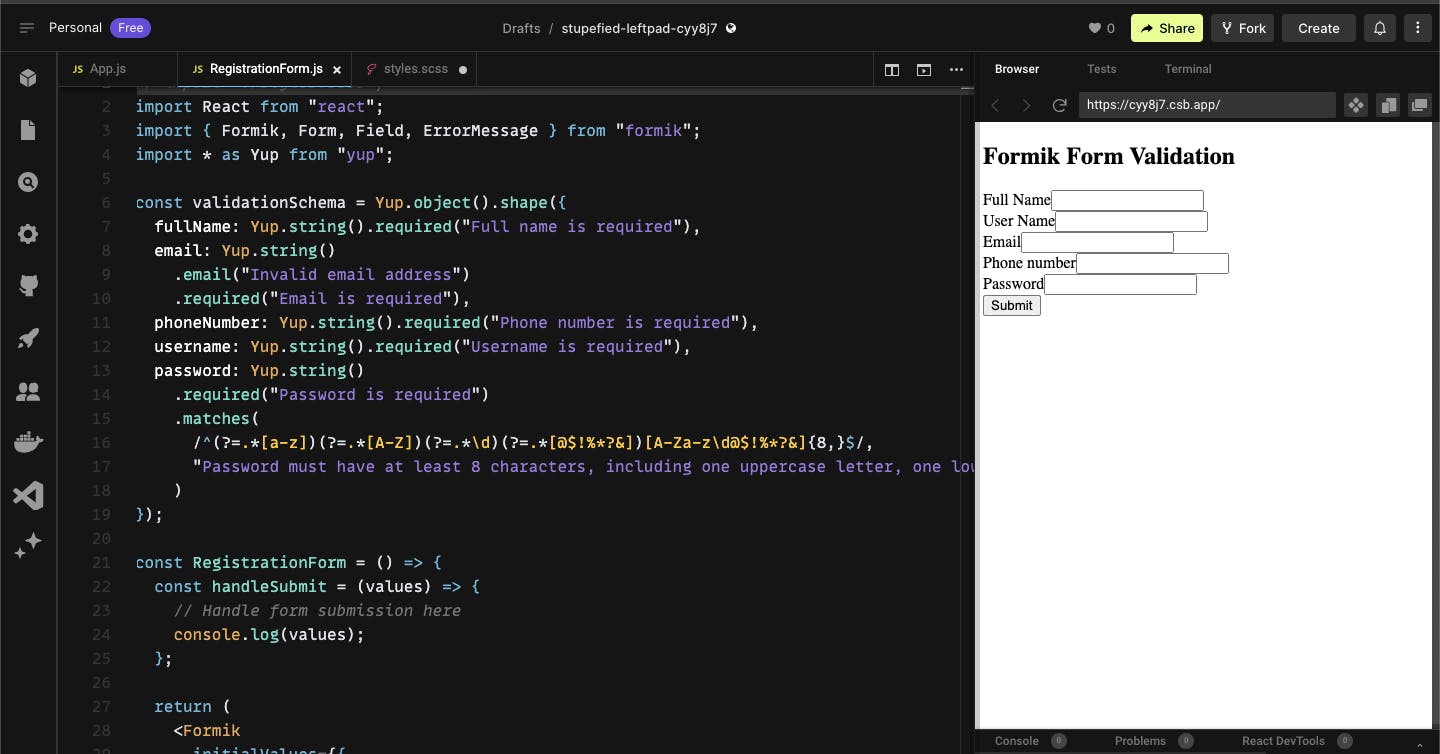
Find the sample output in the screenshot below
Displaying Validation Errors
The <ErrorMessage> component from Formik is used to display validation error messages for each field. Include this component within each field's div to render the error message if validation fails.
import React from 'react';
import { Formik, Form, Field, ErrorMessage } from 'formik';
import * as Yup from 'yup';

const validationSchema = Yup.object().shape({
  fullName: Yup.string().required('Full name is required'),
  email: Yup.string().email('Invalid email address').required('Email is required'),
  phoneNumber: Yup.string().required('Phone number is required'),
  username: Yup.string().required('Username is required'),
  password: Yup.string()
    .required('Password is required')
    .matches(
      /^(?=.*[a-z])(?=.*[A-Z])(?=.*\d)(?=.*[@$!%*?&])[A-Za-z\d@$!%*?&]{8,}$/,
      'Password must have at least 8 characters, including one uppercase letter, one lowercase letter, one number, and one special character'
    ),
});


const RegistrationForm = () => {
    const handleSubmit = (values) => {
    // Handle form submission here
    console.log(values);
  };

  return (
    <Formik
      initialValues={{
        fullName: "",
        email: "",
        phoneNumber: "",
        username: "",
        password: ""
      }}
      validationSchema={validationSchema}
      onSubmit={handleSubmit}
    >
      <div className="container">
        <h2>Formik Form Validation</h2>
        <Form>
          <div className="form-box">
            <label htmlFor="fullName">Full Name</label>
            <Field
              type="text"
              id="fullName"
              name="fullName"
              className="form-input"
            />
            <ErrorMessage name="fullName" component="div" className="error" />
          </div>

          <div className="form-box">
            <label htmlFor="username">User Name</label>
            <Field type="text" id="username" name="username" />
            <ErrorMessage name="username" component="div" className="error" />
          </div>

          <div className="form-box">
            <label htmlFor="email">Email</label>
            <Field type="text" id="email" name="email" />
            <ErrorMessage name="email" component="div" className="error" />
          </div>

          <div className="form-box">
            <label htmlFor="phoneNumber">Phone number</label>
            <Field type="number" id="phoneNumber" name="phoneNumber" />
            <ErrorMessage
              name="phoneNumber"
              component="div"
              className="error"
            />
          </div>

          <div className="form-box">
            <label htmlFor="password">Password</label>
            <Field type="password" id="password" name="password" />
            <ErrorMessage name="password" component="div" className="error" />
          </div>

          <button type="submit">Submit</button>
        </Form>
      </div>
    </Formik>
  )
}
export default RegistrationForm;
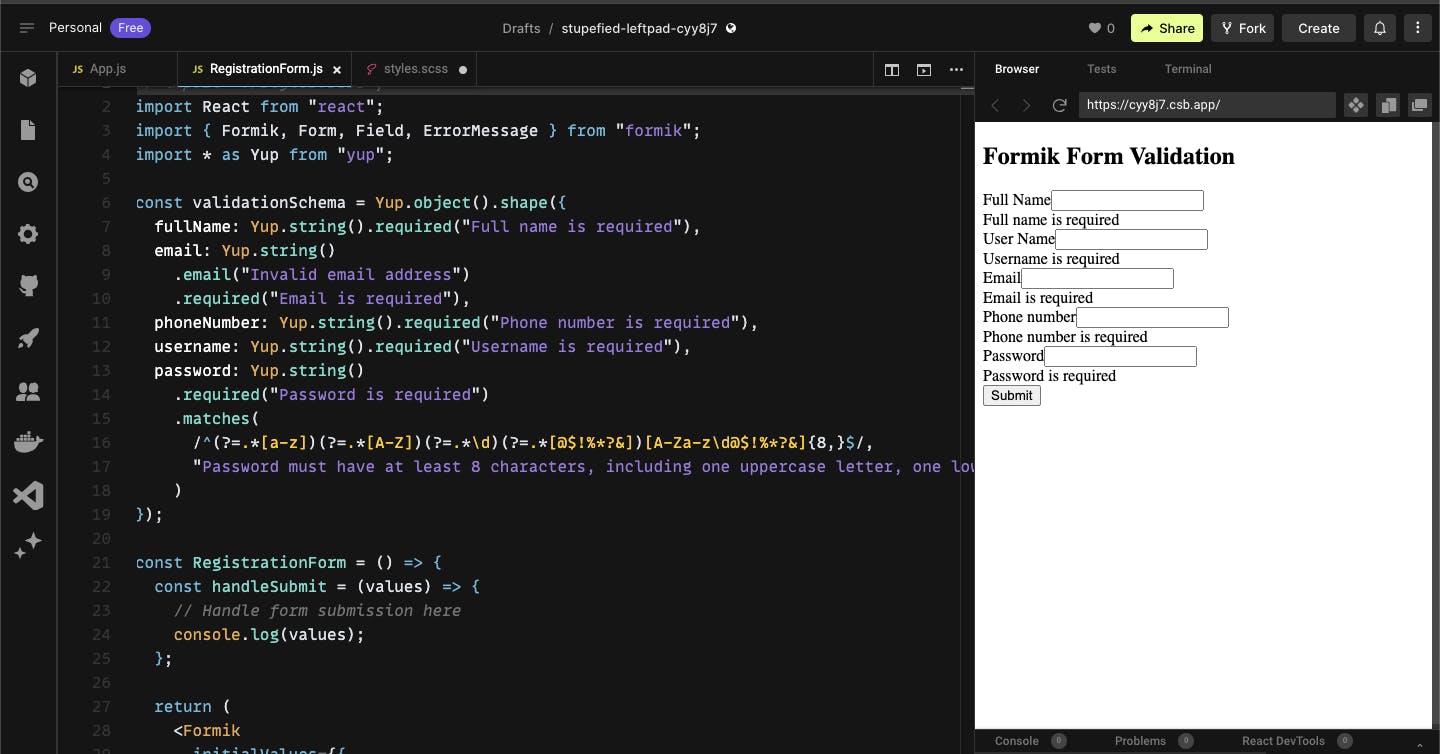
Find the sample output in the screenshot below
Adding Styling
Now let's add some styling to make our form look appealing, we would be using a CSS preprocessor SASS for the styling.
Install SASS by running the following command
npm install sass
After the installation is complete Create a new style file style.scss and paste the following style snippet.
html {
  box-sizing: border-box;
}
*, *:before, *:after {
  box-sizing: inherit;
}

body{
  display:flex;
  align-items: center;
  justify-content: center;
  padding:100px 0;
  margin:0;
}

.container{
  padding:30px 20px;
  width:400px;
  border:1px solid #999;
  border-radius:5px;


  h2{
    text-align:center;
    margin-bottom:40px;
  }


  .form-box{
    margin-bottom:15px;

    label{
      display:block;
      margin-bottom:5px;
    }

    input{
      border:none;
      width:100%;
      border-radius:5px;
      height:50px;
      outline:none;
      padding-left:10px;
      border:1px solid #999;

      &::-webkit-outer-spin-button,
      &::-webkit-inner-spin-button {
        -webkit-appearance: none;
        appearance: none;
      }
    }

    .error{
      font-size:12px;
      margin-top:4px;
      color:red;
    }
  }
      button{
        width:100%;
        background:#000;
        color:#fff;
        border-radius:5px;
        border:none;
        outline:none;
        height:50px;
        text-transform:uppercase;
      }
}
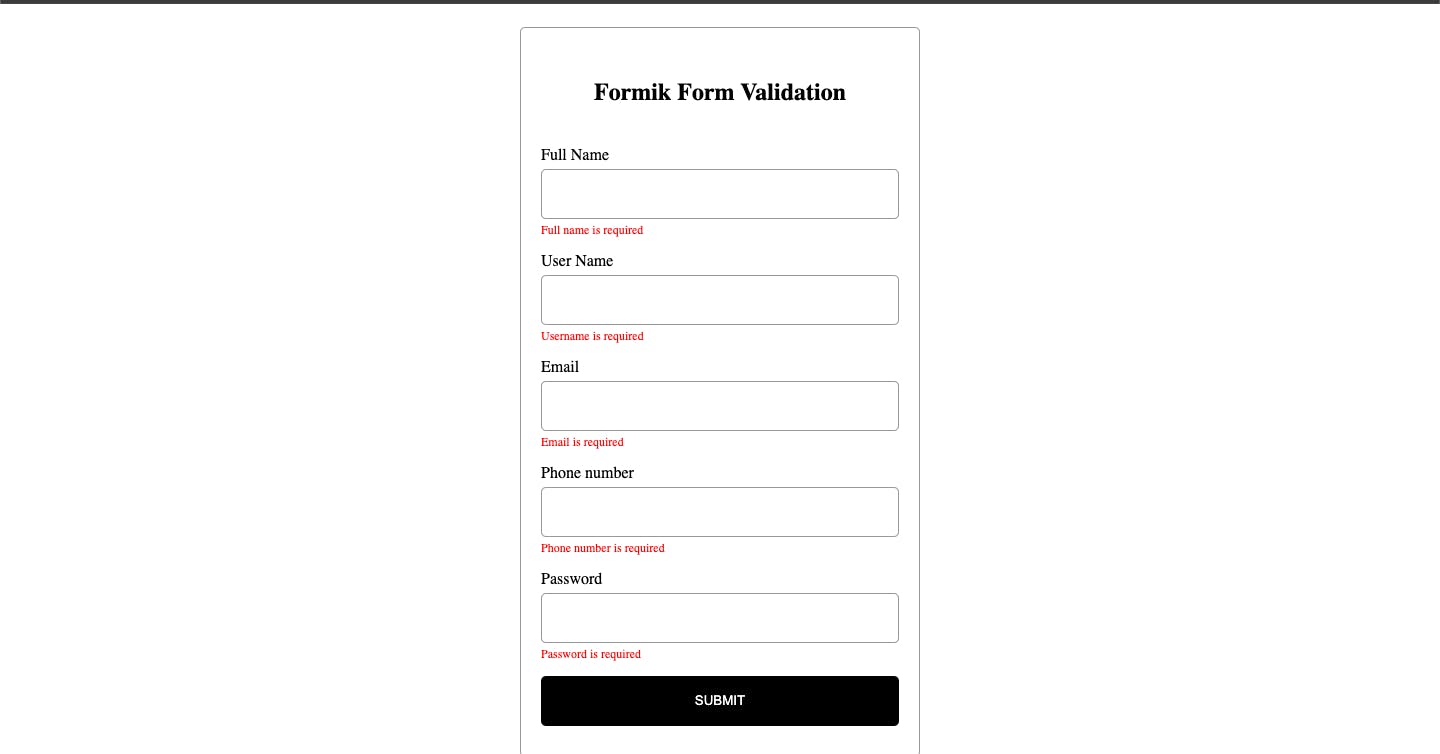
Your output should look like the screenshot below after styling.
Conclusion
By leveraging Formik and Yup, we have successfully implemented form validation for a user registration form in our React.js application. We covered validating fields like full name, email, phone number, username, and password, including password complexity requirements. This ensures data integrity and enhances security.
Form validation is an essential aspect of building reliable and user-friendly applications, and Formik simplifies the process by providing a clean and intuitive API.
Appreciation
Thank you for taking the time to read this article! I hope you found the information and examples provided valuable in your journey as a front-end developer.
Stay tuned for more informative articles, tutorials, and code examples. Together, let's explore the exciting world of front-end development and enhance our skills as we create exceptional user experiences.
Thank you again, and happy coding!